
I have a basic book binding class coming up on the 19th of this month. The class is fully booked and I have been making up kits for my students. They will learn how to bind a simple multi-signature hard cover book. I’ve added more supplies to my kit so I can teach 8 students at a time. I don’t know if there will be any youngsters in the class, but it would be great if there were. Perhaps in the future, I will offer a “Bookbinding For Kids” class.
I’m using sketch paper as the pages. Normally, I use whatever copy paper I have for classes, but it’s flimsy, and while the book is usable, it’s not all that nice. The sketch paper is more durable than copy paper and will hold up better for writing and drawing.
Once they master the basics, I hope they will be inspired to create their own books to use as journals or sketchbooks. For this project, I have cut mat board to 4-1/2 by 5-1/2 in size. I cut the 9 by 12 inch sketch paper in half and they will get the equivalent of six full size papers which they will learn to trim. The maker space currently has an electric industrial paper cutter we can use.
I’m making prototypes to show the various stages of binding from how to determine the grain for folding, covering the boards, and assembling a completed book.
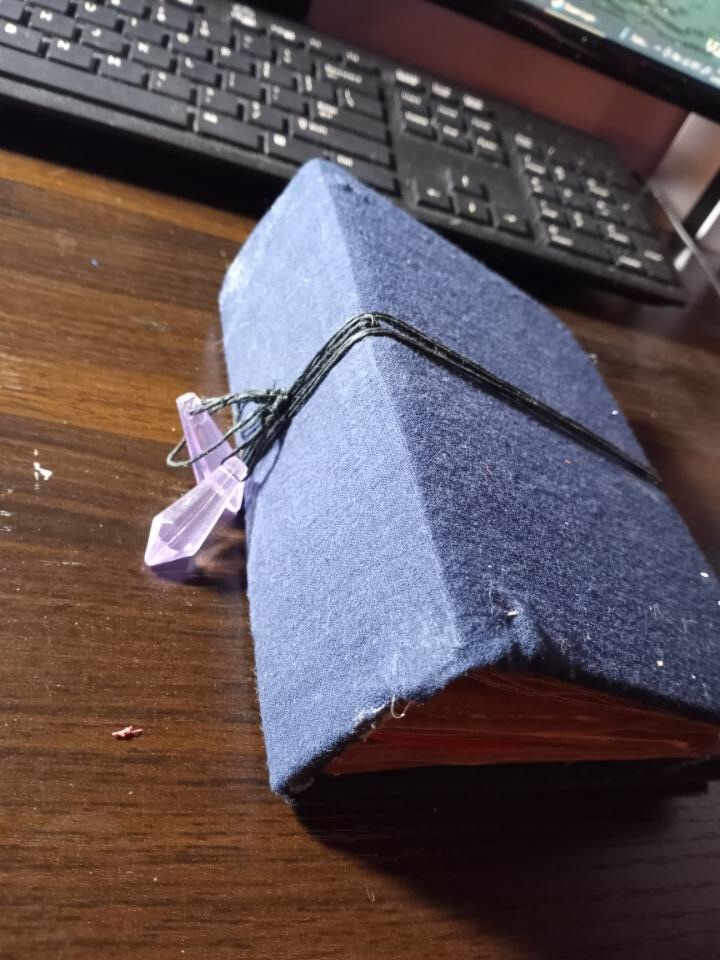
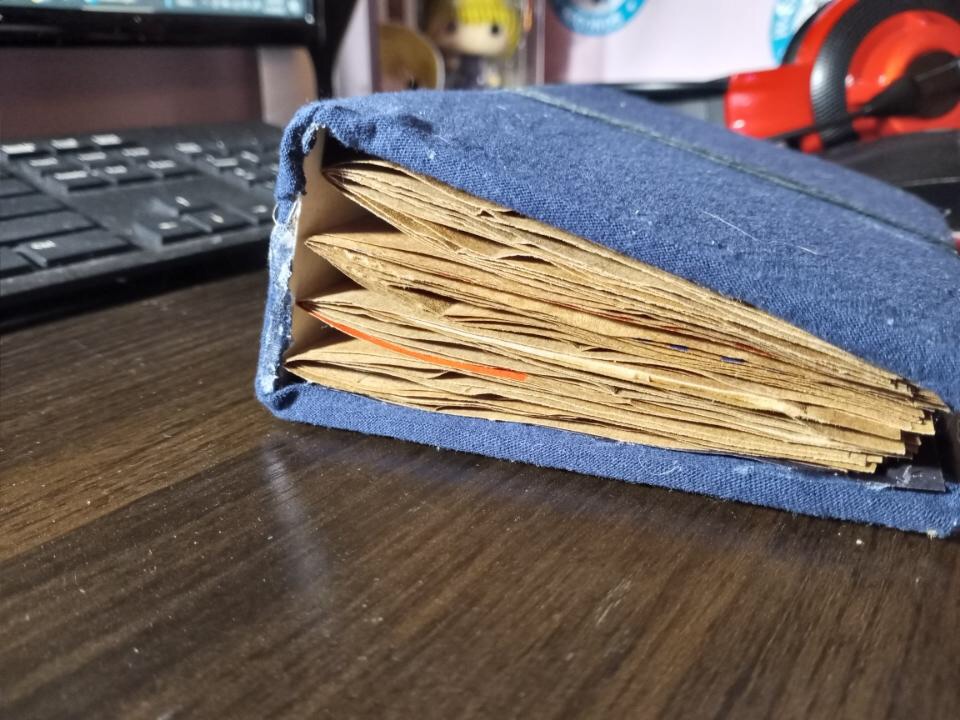
I could have two half-sheets folded as a single signature for six signatures, or up to six half sheets for larger signatures. The problem with larger signatures is a phenomenon called “creep”. When more than two sheets are in a signature, the edges become noticeably uneven, giving a signature a pyramidal edge as each inner paper adds a sliver to the outer edge, with the centermost folded sheets projecting out a distance equal from the edge of the outmost folded sheet like this sideways v >. That gives an uneven edge to the text block.
That’s not a bad thing as many older bound books have signatures arrayed like this. Most book binders trim the edges of the entire text block so they are even before binding the block into the cover. It’s a matter of preference. It’s harder to trim the signatures evenly by hand without an industrial paper cutter that can handle a thick text block.
Depending on the look a binder is trying for, creep could be esthetic. I personally don’t care. Some of the bound item have uneven edges, some are trimmed. I’ve spent a bit on inexpensive binding supplies this round so that I have enough of the basics for each student to take home. They’ll get to keep a bone folder, a couple of piercing tools, a needle, and a good length of waxed thread.
I don’t have waxed linen thread, so we’ll be using waxed cotton tatting thread. I use a beeswax thread conditioner that can be found in the notions area of any fabric shop and run the length of thread across from end to end. I used to use a candle stub before raiding my sewing box for the beeswax.

For my junk journals, I’ve used embroidery thread, dental floss, rattan ribbon, perle cotton, and satin ribbon to stitch signatures and attach bindings. The stitching for the junk journal signatures is mostly done on the outside of the spine and can be done very decoratively. I also like perle cotton for doing Japanese Stab Binding. This technique will be a different class offering.

I’ll let you know how the class goes.
