Category Archives: Bookbinding

I’m a bit behind in my paintings

Partly because I was setting up my studio, and partially because I’ve been in a lot if pain lately. Probably because of setting up my studio and too much lifting. I keep forgetting I’m old.

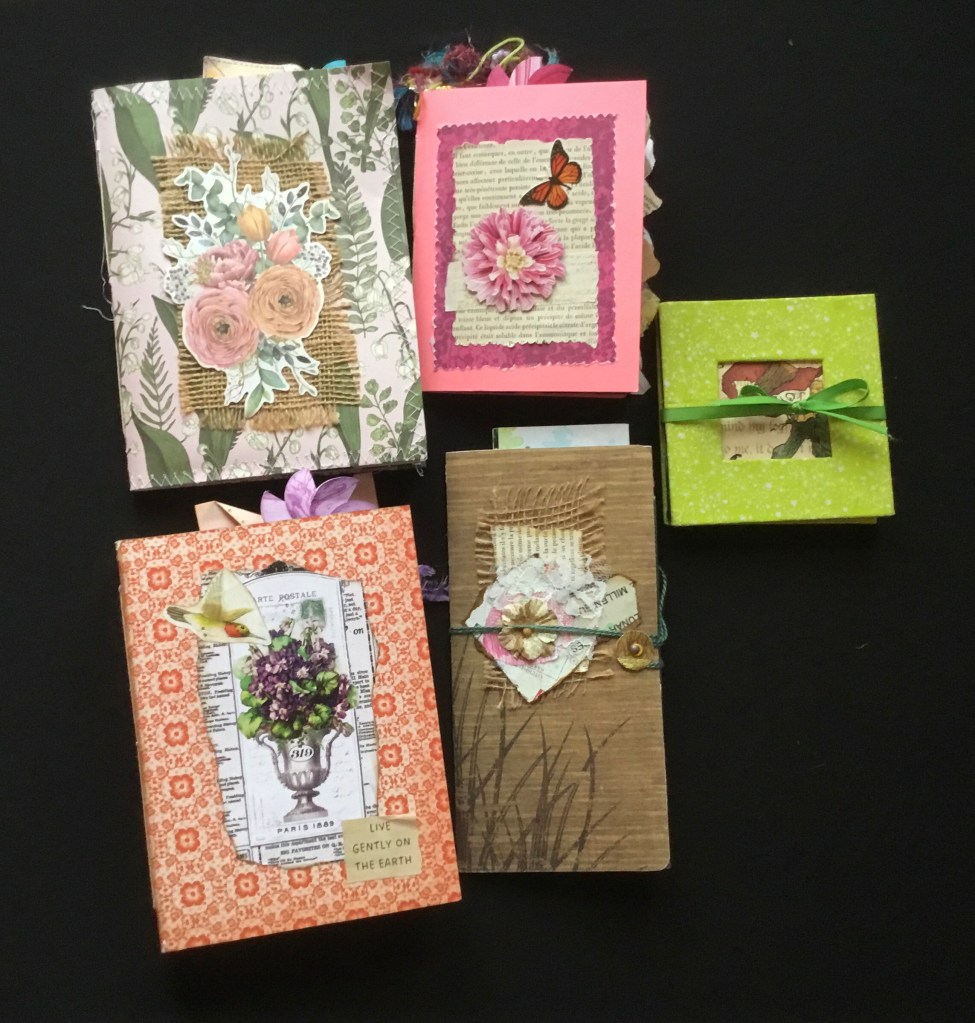
I made a book to hold the second group of paintings.

This one has 26 pockets to bring the total to 50
Latest paintings

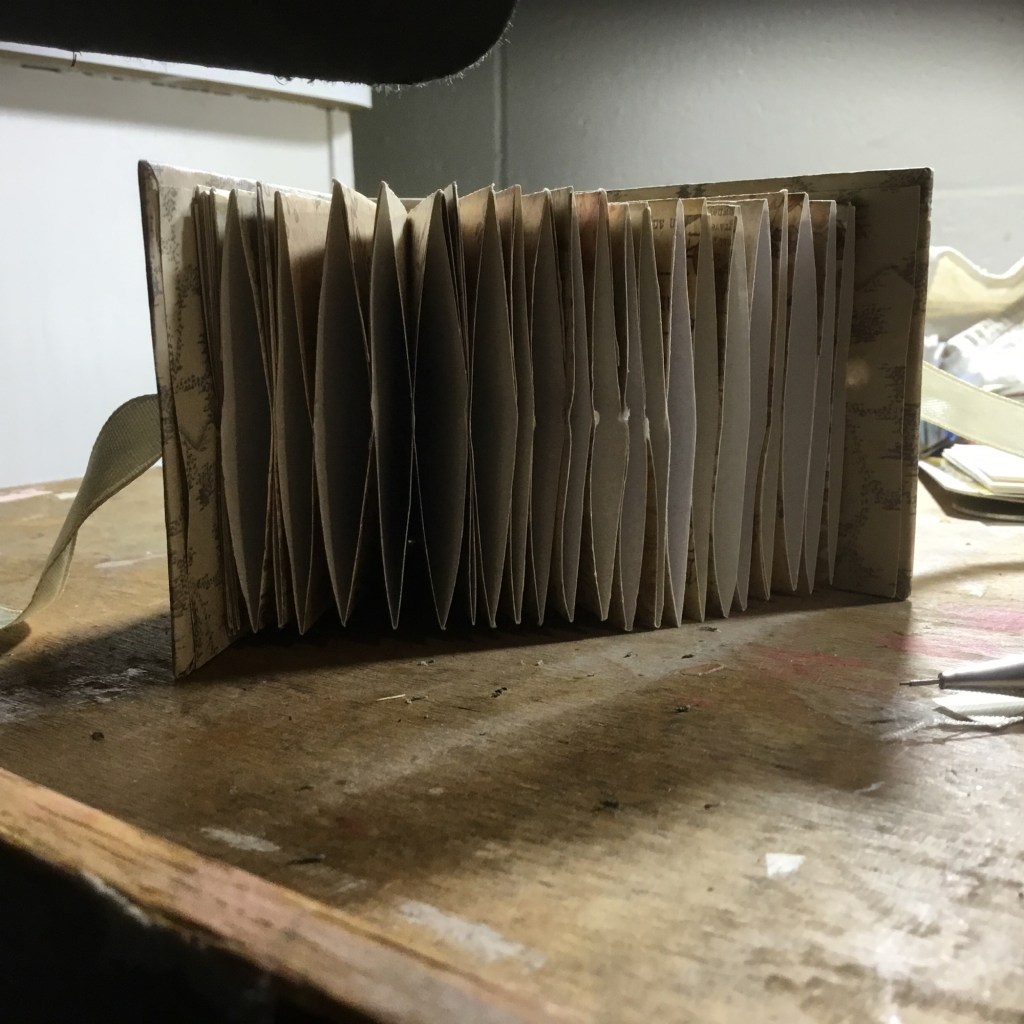
There are cats for the most part.

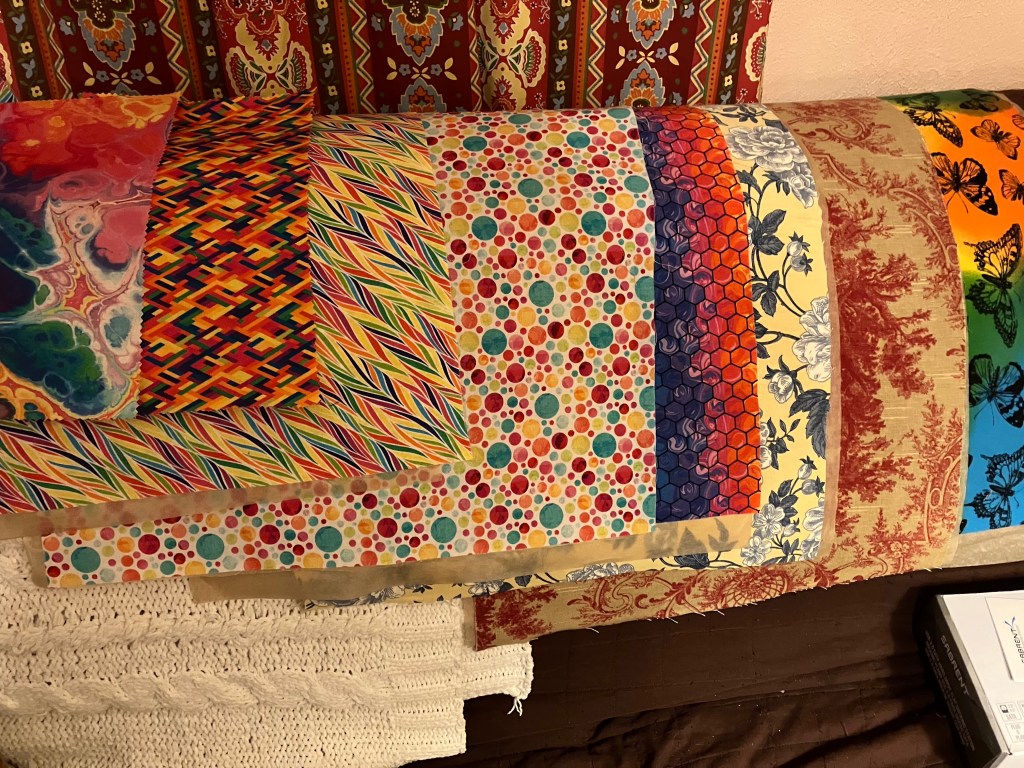
I’m currently 2 scheduled paintings behind. I’ll catch up. I’ve also been clearing out fabric scraps at the Makerspace. I’ve emptied one bin and have the bin equivalent in unusable scraps in a trash bag to take for recycling. I still have two bins to sort.

I’ve been winding the lengths I’m keeping on pieces of mat board and standing the wound fabric upright in the bins. It’s much easier to see and touch the fabric. I didn’t bother to measure the lengths. For right now, I just want to get usable fabric organized. You wouldn’t believe how many tiny scraps were in the bins. Why was someone saving a 2” by 2” scrap of felt?

There were all kinds of tiny scraps. I suppose they could have been stitched into a “crazy quilt” but I doubt it would be worth the effort. If one of our sewists wants to take the bag and stitch the scraps together, I’m all for it. I have my own bag of scraps waiting for me to sew. I don’t need to add to my hoard.

I hate to give stuff to Goodwill. One of the local agencies gives vouchers to women to get clothing there. But the pricing for the donated items has gotten outrageous. Or so I’ve heard. I don’t shop there. I’m going to check with one of the local Hospice organizations that operates a resale shop. If they will take my clothing, I’ll give the extras to them.

My next project needs to be weeding out my closet and dresser. I probably have enough extra clothes to dress an entire homeless women’s shelter. My youngest granddaughter took half of my sweaters. She would have taken them all, but she doesn’t wear v-necks.

I almost never wear anything but tee shirts, flannel shirts, and an assortment of leggings, knit pants, and sweat pants. If the clothing exchange still existed, I would take my stuff there. When I retired, I gave them 7 bags of my work clothes so women who needed nice clothing for work could make use of them.

Tomorrow, I’ll take pictures of the studio.

I never thought I’d be living in a real life American Horror Story.

This will not end well. It’s been three weeks and the entire world is aflame, metaphorically speaking. Or maybe it’s hyperbole. At any rate, I have to stop doom-scrolling. I’m making myself sick.

So to change the subject…

I’ve done the final print of the book I’m working on. I have a cover design. The next step is to sew the signatures. After that, comes pressing the signatures and preparing the text block for casing in, trimming the edges, and creating the covers and spine. And then the final assembly. After all that, I will apply silver foil to the cover design. A final couple of hours in the press and the book will be done.

I’m also working on some simple notebooks in case the Maker Space decides to participate in any sort of artsy sale this year. Whenever we have have one of these events, I do well. Well in a relative sense. I sell handmade junk journals, blank books, zines, and book related items such as book cloth, bookmarks, and repurposed books.

I make way more money than I put into the items with regard to cost of materials. I really don’t factor in my time because I make things to use up the myriad supplies and equipment I have purchased over the years and to keep myself from just lying around on the couch scrolling through Pinterest and Youtube or re-watching Supernatural, Buffy, or Star Trek/Wars for the umpty-hundreth time.

Not that I actually watch any of those. Yes, one or another is playing in the background to provide voices so I don’t have to listen to the noise in my head. I discovered that there is an actual name for the music I hear in my head – Musical Ear Syndrome. So instead of just the incessant buzzes, mumbly sounds, and dings of tinnitus, hearing what sounds like the 1930’s and 1940’s style big band music and carnival calliopes is a real thing.

Chalk it up to my black and white youth. I watched old movies from that time period. And most of the television shows were black and white or if they weren’t, I watched them in black and white. My family didn’t get a color television until just after I started college in the late ‘60s. I watched the first season of original Star Trek in black and white. I didn’t know there were red shirts until I finally saw it in color. It was just that certain people seemed to be targets. I thought that maybe the aliens thought those guys were important and they were going for the leaders.

Silly me.

So what’s next?

I’m ready to complete the book I’ve been working on. We met today and I turned over the final draft for a read-through before I print and bind it. As I’ve said before, this is a one-off commemorative volume. We’ve settled on the binding and the decoration for the cover. I have a nice batik print as the background for a silver foil starry sky and fireflies to be added.

I’ll do the final printing next week and finish the assembly and binding the week after. I’m not charging for this. If I am offered something, I might accept it, but I can’t price pain. Bookbinding and making are things I like to do. I charge a nominal sum for book repairs when I do those.

Most of the books I make are junk journals. That’s a fairly new type of book making – new as in the last ten years or so. It’s become a hobby or a business for lots of crafters. The difference between the forms of bookbinding is that junk journals are easier to make and the supplies for junk journals are found in your daily mail, your sewing box, your scrapbooking supplies, and around the house.

No special equipment is needed except a box cutter or scissors, a metal ruler, a cutting mat, assorted papers, and fabric scraps, glue, tape, a needle, and heavy thread or embroidery floss. For decorations, old greeting cards, magazine pages, and scraps of paper will suffice. Crayons, paints, colored pencils, ink pads and stamps are nice, but you don’t need to go overboard.

Most supplies can be gotten in the crafts section at the dollar store. For instance, Dollar Tree sells pokey tools, rulers, cutting mats, glue, inks, stencils, and other art supplies for $1.25 each. I was able to outfit my beginning bookbinding students with tools for a bit over $10 each. The costs came from their fees.

For junk journals, I use any old cardboard and the book cloth is made with iron-on interfacing. The stitching of the signatures is done directly on the spine and rarely covered up. Embellishments and pockets are added to hold snippets of papers and journaling cards. They are books to be written and drawn in. If something rips, a colorful tape will bind it together and become part of the decorations.

The type of binding I doing on this slim book involves more complicated assembly. I have the last of my archival quality book board to use. I will use the last of my acid-free tissue to line the fabric that will cover the boards. My industrial paper cutter will be used to assure clean edges. Acid free glue will hold cloth and boards together. Linen thread will bind the signatures. This will be a volume to be handed down to generations.

Once it is done, I will post a picture. Or maybe I should post pictures that show each step of the process.

Fun project

I just finished designing and typesetting a book for the wife of one of the Maker Space’s Area Captains. It’s slim volume of letters written to her niece during the Pandemic about a traumatic event that occurred. I’m awaiting final approval on the text block before printing it.

Once it’s printed, I will bind it as a hard cover book. I’ve already designed the cover which will be embellished with silver for the title and cover image. It will be similar in style to this sketchbook I made for my youngest granddaughter a few years ago. It has her zodiac sign and her name on the front and the year on the spine with silver accents instead of gold.

I also have a nineteenth century history book to repair. I just need to find a nice piece of thin leather for the spine which is the largest repair. i haven’t come across one yet. I have leather workers who are checking their stashes for the right kind of leather. I’m also watching the thrift shops for a purse of the right leather type that I can use the leather from.

Making book cloth using iron-on interfacing

I like to have colorful book covers for my handmade books. I have a supply of library quality book cloth, but it is solid-colored, boring, institutional looking, but it’s very sturdy.  I also have some nice Japanese papers that I use to cover book board as well. But sometimes I want a cloth cover, but not a plain one. I found some videos on YouTube that showed a way to make book cloth from regular fabric. The videos I learned from are listed below.

The supplies you will need are:

  • A Fat quarter from the fabric store or a half yard of fabric

A fat quarter, if you don’t know, is a specific cut from a yard of fabric. It is not the same as a quarter yard. When you order a quarter yard, you get a cut of fabric 9 inches in length across the width of the cloth. A fat quarter comes from a yard of fabric cut lengthwise and widthwise to make 4 equal sized pieces of fabric, 18 by 18 inches for 36-inch-wide fabric or 18 by 22 inches for 45-inch-wide fabric. Fat quarters are readily available in fabric and craft stores and in the sewing section of Walmart and similar stores for under $3.00 US.

  • Lightweight fusible interfacing – the double-sided kind. One side will be fused to the fabric and the other to the next item on the list. The interfacing can be found in the fabric by the yard section of the fabric stores and as a 1-yard pre-packaged cut in the crafts area of other stores.
  • White tissue paper. You want white because the dye used for colored tissue tends to bleed if it gets wet.

You will also need:

  • An ironing board
  • A pressing cloth
  • An Iron
  • A cutting mat
  • A ruler or yard stick
  • A rotary cutter or scissors

Wash and dry your fabric to remove any sizing. I usually wash all my fat quarters at one time, iron them, and fold them once and lay them on a clothes hanger for later. Place your fabric on the ironing board with the wrong side up. Iron out the creases and wrinkles using the steam setting. Cut the interfacing slightly larger than the fabric. Lay the interfacing with the paper liner side up. Turn off the steam setting or empty the iron. Press according to the instructions on the interfacing package. Follow the package directions fir when to peel off the backing paper. Peel the backing paper off and cover with the tissue paper. Iron again to attach the tissue paper. When cool, trim the tissue paper edges flush with the fabric using your rotary cutter or scissors. Roll the book cloth into a tube to avoid creases and store until needed. Use like regular book cloth.


Treasure Books

Nik the Booksmith

Finally, the faux leather journal is done.

I finally completed the book. The first one didn’t turn out as I planned but the second is rather nice. The inside cover has scrapbook paper linings and flyleaves. The pages are folded from good quality laser printer paper. It’s not quite perfect, but usable. My next one will be better, but this isn’t too bad for a prototype.

I did learn quite a bit from this project. I’ll probably teach the technique at one of my paper craft sessions if others are interested.

The finished product.

Very disappointing class Tuesday evening.

I mentioned I belong to a maker space where I am what we call an Area Captain. I am responsible for our Craft Area. This area deals with various crafts such as sewing, knitting, paper-crafts and others. I am responsible for orienting members to the area, training or checking them off in the operation of our sewing machines and other equipment, plus doing the basic maintenance of said machines.

I also teach classes in the use of the heat press and its attachments, book binding, origami, and printmaking. Other members teach things like fabric flower making, sewing, how to use the embroidery machine or the vinyl cutter, as well as some book binding and origami. We often do one-on-one teaching and problem solving of knitting, crochet and weaving projects. We have painters, costume makers, costume designers

Tuesday evening was Paper Crafting night and I was teaching how to make zines. For those of you unfamiliar with them, zines are tiny publications made from one sheet of folded paper. The zines I was teaching people to make were to be decorated with rubber stamps, markers, and pictures and text from Readers Digest Condensed Books, magazines, and other papers.

Only one person showed up. I showed her several samples that I had made and one that I had bought at Zine Fest. She made a very nice start, but decided to leave early, so I don’t have a picture to share. Next month, I’ll won’t be able to hold a class, but I’m hoping that one of our origami enthusiasts will take over that night.

Today’s To-Do List was a failure.

I did get the dishes done. I was busy. I performed The Wisconsin Lilac Chainsaw Massacre and managed to reduce one lilac by half and get most of the cuttings down to the street for pickup. I’ll give another go tomorrow – maybe. I haven’t checked the weather forecast. I also whacked down the invasive dogwood whatever that keeps sprouting in what was once a nice perennial garden. Like an aspen, the thing spreads via its roots.

If I hadn’t had to plant a couple arbor vitae and a lot of tall flowers to keep the old lady that lived next door out of my yard, the dogwood wouldn’t have taken over so badly because I would have kept mowing over them. But the old biddy next door had to be in my yard, pulling everything she considered a weed and leaving them either on top of my trash can of just tossed in my driveway. So I wasn’t mowing that area very much and the dogwood kept growing in the perennials.

The neighbor was a load of fun. She used to sneak over and put her trash in my bin. Her reason for doing so was that the can the city gave out was too large so she would just do it until she got the smaller bin. However even after she got her bin, she’d use mine until I finally told her I didn’t want to deal with her if she fell in my driveway while trespassing.

She objected so strenuously to my cans being on the side of my garage that she could see from her window, that she bought and had someone install, six-foot high vinyl fence panels on her property to hide my cans from her sight. The fence panels ran the length of my garage. I moved them to the front of the garage and she installed two more panels. I considered moving the cans down the length of my driveway a few feet a year to see if she would keeping buying fence but I never did that. She’s gone now so no more problems. I have a nice couple as neighbors now.

Anyway, back to my list – part of the list was to finish 3 Japanese stab bound notebooks for the upcoming Artists’Night we’re having at the Makerspace I belong to. I did practice cards of the patterns I intended to use, but one pattern took a lot of practice to get right.

First there was getting the design on graph paper. Then determining the stitching. Once that was done, I did a practice card. It was stitch, take out the thread, start over, take out the thread. I finally got the pattern and the stitching steps right. I still had a bit of trouble because the more complex the pattern, the longer the thread has to be and even with the waxed thread, tangles occur.

Then the fun began. I lost count of the steps and had to start over. After a few tries, things fell into place and the pattern started to take shape. I got two-thirds of the way done and ran out of thread. Spent a lot of time sewing the book. Halfway through, I realized I used a wrong hole. No big deal. Pulled out the thread and ripped the cover. I made a new cover.

Realized that even though I was using longer length of thread, it was too short. Picked the thread out. Started over, halfway through got a major knot. Gave up. I’ll try again tomorrow. I have to go make a new to-do list.

I’ve been so busy, I forgot I have to maintain a blog.

This is what happens when I take on too many projects at one time. I need to schedule my time and try not to do so many projects at once. Prepping for a craft show, taking two classes, dog-sitting a dog with anxiety, knitting, weaving, and just generally losing control on my time is getting almost nothing accomplished.

There are other things that are scheduled like hosting a weekly event, teaching a monthly class, attending a couple of weekly meetups – not Meetups – that go on. And I have all sorts of paper planners and scheduling software that could make things easier, but I still can’t keep organized. Yes, recurring events are on the calendar, but apparently, I need a daily schedule, even for things like “do the dishes” and “clean the bathroom” and “take the pills that are saving your life” since I still manage to occasionally skip a dose.

I used to make lists and that’s what I need to start doing again. Make a list of everything I want to accomplish one day at a time. Thanks for reading. I’ll let you know how it goes.

These are some of the items for the craft show. Junk journals, a folio, and an explosion book.

And May the 4th be with you,

Book Cloth

Today I made some book cloth to use on junk journal covers. It’s very easy to create colorful covers with do-it-yourself book cloth. I had been planning to make for a few months and finally decides to do it.

A colorful assortment of book cloth.

Anyone can make their own book cloth using fabric, tissue paper and a fabric bonding agent. What I used was a fat quarter bundle from Joann Fabric and Crafts, a product called Heat ‘n’ Bond, also from Joann’s, and white tissue paper from the No-longer Dollar Store.

For those who don’t sew, a fat quarter is the equivalent of a quarter yard of fabric. However, it is very different from a regular quarter yard. A quarter yard of fabric will be a nine-inch wide strip cut across the width of the fabric. A fat quarter is a yard of fabric cut lengthwise and crosswise to form four rectangles around 18 by 22 inches or slightly more depending on whether the fabric is 32 inches wide or 44/45 inches wide. Individual fat quarters can be bought or they may be bundled with coordinating colors or patterns.

Heat ‘n’Bond can be bought by the yard off the bolt or prepackaged. The light hold works well since you will only be bonding the fabric to the tissue paper. The book cloth will either be glued to the cover or sewn around the edges. The tissue paper keeps the glue from seeping through the fabric.

You will also need an iron and ironing board, scissors, and a ruler. You don’t have to prewash the fabric. Set the iron according to the recommended setting for the type of Heat ‘n’ Bond you have. Cut the Heat ‘n’ Bond to the size of the fabric piece. Press any wrinkles out of the fabric before placing the bonding sheet down on the wrong side of the fabric. I usually iron in a circular motion, ironing out from the center of the piece. Check the edges to make sure the adhesive is on the fabric and not stuck on the backing paper.

Once you’re certain the adhesive is in place on the fabric, remove the backing sheet by lifting a corner and gently pull up across the sheet. If the iron missed spots, press the area and check again. The fabric should still be warm when you pull up the backing sheet. Lay a sheet of tissue paper on top and iron until the tissue paper is adhered to the fabric. Trim the edges even with the bonded area. Et, voila! Book cloth.